BottomNavigationBar in Flutter is a widget that displays at the bottom of the screen and allows users to navigate between different screens and locations inside an app.
First, you’ll need to make a list of BottomNavigation Bar in Flutter widget, each of which will represent a different path or screen in your Flutter app, before you can use a BottomNavigationBar. The BottomNavigationBarItem may only be shown with an associated icon and label.
Basic BottomNavigationBar in Flutter with three items:
BottomNavigationBar(
  items: [
    BottomNavigationBarItem(
      icon: Icon(Icons.home),
      label: 'Home',
    ),
    BottomNavigationBarItem(
      icon: Icon(Icons.search),
      label: 'Search',
    ),
    BottomNavigationBarItem(
      icon: Icon(Icons.person),
      label: 'Profile',
    ),
  ],
  currentIndex: _selectedIndex,
  onTap: _onItemTapped,
)
An integer variable, _selectedIndex, records the item’s index that is presently selected, and a function, _onItemTapped, is called whenever the user taps on an item. By resetting the BottomNavigationBar to show the newly selected item, the function modifies the _selectedIndex variable.
Generally speaking, the BottomNavigationBar is a fantastic method to integrate navigation into your Flutter app, and it’s very modifiable so you can customize it to go in with the rest of your app’s aesthetic.
Custom BottomNavigationBar in Flutter
With the BottomNavigationBar widget, you may alter its looks and functionality to create a unique bottom navigation bar. How to make a unique BottomNavigationBar:
- Import the packages:
import 'package:flutter/material.dart';
- Create a collection of BottomNavigationBarItem widget to stand in for the menu items. An image and a label are needed for each BottomNavigationBarItem.
List<BottomNavigationBarItem> _items = [
  BottomNavigationBarItem(
    icon: Icon(Icons.home),
    label: 'Home',
  ),
  BottomNavigationBarItem(
    icon: Icon(Icons.search),
    label: 'Search',
  ),
  BottomNavigationBarItem(
    icon: Icon(Icons.person),
    label: 'Profile',
  ),
];
- Create a variable to store the current selection:
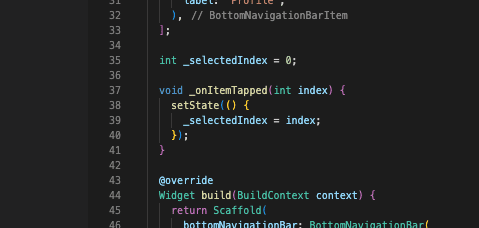
int _selectedIndex = 0;
- To process clicks on the menu bar’s links, you need declare the following method.
void _onItemTapped(int index) {
  setState(() {
    _selectedIndex = index;
  });
}
- Create your own unique look and feel with the BottomNavigationBar widget. Assign the value
_selectedIndexto the currentIndex property to show which option is presently selected. For events related to tapping things, set onTap to_onItemTapped. To alter the appearance of the chosen and unselected items, use theselectedItemColorandunselectedItemColorattributes.
BottomNavigationBar(
  items: _items,
  currentIndex: _selectedIndex,
  selectedItemColor: Colors.blue,
  unselectedItemColor: Colors.grey,
  onTap: _onItemTapped,
),
- On your Scaffold’s bottomNavigationBar property, add the BottomNavigationBar widget.
Scaffold(
  appBar: AppBar(
    title: Text('Custom BottomNavigationBar'),
  ),
  body: Center(
    child: Text('Selected index: $_selectedIndex'),
  ),
  bottomNavigationBar: BottomNavigationBar(
    items: _items,
    currentIndex: _selectedIndex,
    selectedItemColor: Colors.blue,
    unselectedItemColor: Colors.grey,
    onTap: _onItemTapped,
  ),
);
Complete Code Custom BottomNavigationBar in Flutter
import 'package:flutter/material.dart';

void main() {
  runApp(MyApp());
}

class MyApp extends StatelessWidget {
  @override
  Widget build(BuildContext context) {
    return MaterialApp(title: 'flutterflux', home: MyHomePage());
  }
}

class MyHomePage extends StatefulWidget {
  @override
  _MyHomePageState createState() => _MyHomePageState();
}

class _MyHomePageState extends State<MyHomePage> {
  List<BottomNavigationBarItem> _items = [
    BottomNavigationBarItem(
      icon: Icon(Icons.home),
      label: 'Home',
    ),
    BottomNavigationBarItem(
      icon: Icon(Icons.search),
      label: 'Search',
    ),
    BottomNavigationBarItem(
      icon: Icon(Icons.person),
      label: 'Profile',
    ),
  ];

  int _selectedIndex = 0;

  void _onItemTapped(int index) {
    setState(() {
      _selectedIndex = index;
    });
  }

  @override
  Widget build(BuildContext context) {
    return Scaffold(
      bottomNavigationBar: BottomNavigationBar(
        items: _items,
        currentIndex: _selectedIndex,
        selectedItemColor: Colors.blue,
        unselectedItemColor: Colors.grey,
        onTap: _onItemTapped,
      ),
      appBar: AppBar(
        elevation: 0,
        title: Row(children: [
          Image.asset(
            'assets/logo.png',
            height: 30,
          ),
          Text('flutterflux.com')
        ]),
      ),
      body: Center(
        child: Text('Selected index: $_selectedIndex'),
      ),
    );
  }
}

class CustomAlertDialog extends StatefulWidget {
  @override
  _CustomAlertDialogState createState() => _CustomAlertDialogState();
}

class _CustomAlertDialogState extends State<CustomAlertDialog> {
  final TextEditingController _textController = TextEditingController();

  @override
  void dispose() {
    _textController.dispose();
    super.dispose();
  }

  @override
  Widget build(BuildContext context) {
    return Dialog(
      shape: RoundedRectangleBorder(
        borderRadius: BorderRadius.circular(16.0),
      ),
      elevation: 0.0,
      backgroundColor: Colors.transparent,
      child: contentBox(context),
    );
  }

  Widget contentBox(context) {
    return Container(
      decoration: BoxDecoration(
        shape: BoxShape.rectangle,
        color: Colors.white,
        borderRadius: BorderRadius.circular(16.0),
        boxShadow: [
          BoxShadow(
            color: Colors.black,
            offset: Offset(0.0, 10.0),
            blurRadius: 10.0,
          ),
        ],
      ),
      child: Column(
        mainAxisSize: MainAxisSize.min,
        children: <Widget>[
          SizedBox(height: 16.0),
          Text(
            'Enter your name',
            style: TextStyle(
              fontSize: 18.0,
              fontWeight: FontWeight.bold,
            ),
          ),
          SizedBox(height: 16.0),
          Padding(
            padding: EdgeInsets.symmetric(horizontal: 16.0),
            child: TextField(
              controller: _textController,
              decoration: InputDecoration(
                hintText: 'Name',
                border: OutlineInputBorder(
                  borderRadius: BorderRadius.circular(16.0),
                ),
              ),
            ),
          ),
          SizedBox(height: 16.0),
          Row(
            mainAxisAlignment: MainAxisAlignment.end,
            children: <Widget>[
              ElevatedButton(
                child: Text('Cancel'),
                onPressed: () {
                  Navigator.of(context).pop();
                },
              ),
              SizedBox(width: 8.0),
              ElevatedButton(
                child: Text('Save'),
                onPressed: () {
                  String name = _textController.text;
                  // Do something with the name
                  Navigator.of(context).pop();
                },
              ),
              SizedBox(width: 16.0),
            ],
          ),
        ],
      ),
    );
  }
}
Output

With this method, you may generate a unique BottomNavigationBar with the following three links: Home, Search, and Profile. Whenever time a user selects an item while within the Scaffold, the index associated with that item will be changed and shown within the main screen.
Conclusion
Adjusting the BottomNavigationBar widget’s attributes, such as the selected item color, unselected item color, and style of animation used while transitioning between pages, allows developers to personalize the widget’s appearance and functionality.
By making it simpler for users to move between different portions of the program, the BottomNavigationBar widget may enhance the UX of mobile applications.

