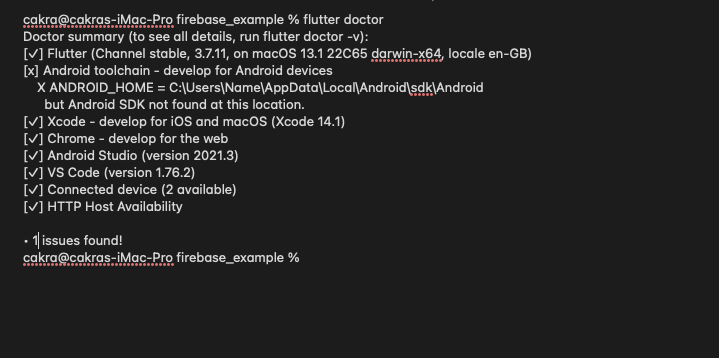
Android SDK not Found – Flutter SDK errors like “Android SDK not found at this location” can occur. This error message can frustrate and delay development. This article covers how to fix this issue.

Android SDK Comprehension
Before fixing the “Android SDK not found at this location” error message, we must understand what the Android SDK is. Android application development requires the Android SDK’s tools and libraries. ADB and other development tools are included.
Reasons for the Error Message
There are a number of potential causes for the “Android SDK not found at this location” error. The most frequent explanations include:
- Incorrect installation: Messages of error might appear if the Android Software Development Kit was installed improperly or in the wrong location.
- Incorrect path: The error message may appear as a consequence of an incorrect setting of the path to the Android Software Development Kit (SDK) within the environment variables.
- Conflicts with other software: The error message may be caused by system software conflicts.
Steps to Fix the Error Message
Now that we understand the reasons why the “Android SDK not found at this location” error message can be displayed let’s take a look at the steps to fix it.
Step 1: Check Android SDK Installation
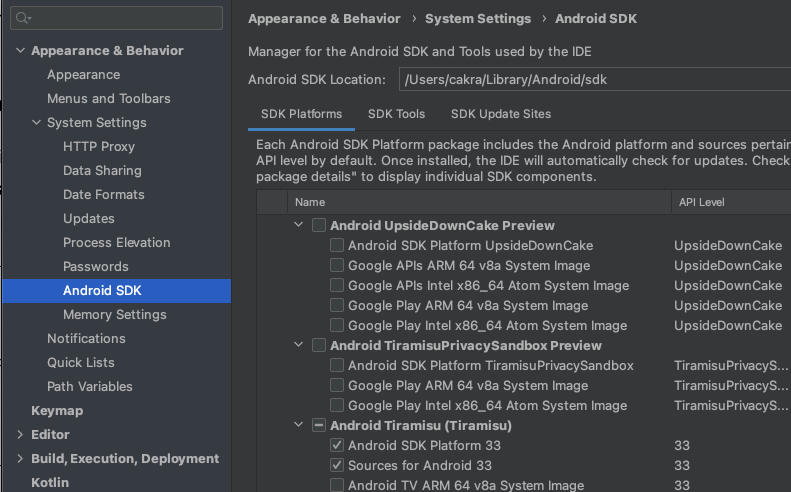
The first step is to verify that the Android SDK is installed correctly on your system. To do this, open Android Studio and go to File > Settings > Appearance & Behavior > System Settings > Android SDK. This will open the Android SDK Manager, where you can check if the Android SDK is installed correctly.

If the Android SDK is not installed, click on the “SDK Platforms” tab, select the version of Android you want to develop for, and click “Apply”. This will download and install the Android SDK.
Step 2: Set Android SDK Path
Next, set the Android SDK path in environment variables. Follow these steps:
- Right-click “My Computer” and choose “Properties.”
- “Advanced System Settings” is on the left.
- Click on the “Environment Variables” button at the bottom of the screen.
- Under “System Variables,” scroll down and find the “Path” variable.
- Click “Edit” and add the Android SDK path to the list. Add “;C:\Android” to the list of paths if the Android SDK is installed in “C:\Android”.
Step 3: Restart Android Studio
Restart Android Studio after setting the SDK path. This applies environment variable changes.
Step 4: Create a New Project
Once Android Studio has restarted, create a new Flutter project. To do this, go to File > New > New Flutter Project. Follow the prompts to create the project.
Step 5: Configure the Flutter SDK Path
Configure the Flutter SDK path after creating the Flutter project. Open Android Studio, click “File > Project Structure,” and select “Flutter SDK Path.” Set the system-installed Flutter SDK path.
Conclusion
“Android SDK not found at this location” errors can slow development. Following the steps above, you can quickly fix this error message and continue developing your Flutter app. Verify that the Android SDK is installed correctly, set its path in the environment variables, restart Android Studio, create a new project, and configure the Flutter SDK path. read too Troubleshooting Guide: How to Fix ‘Android SDK File Not Found’ Error


