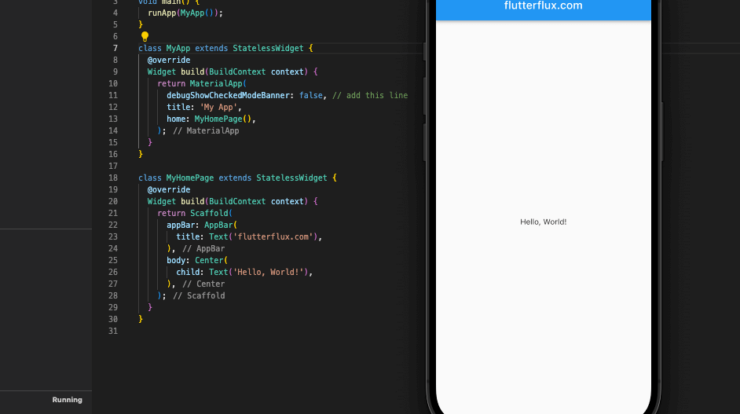
Remove debug banner in Flutter – Flutter apps in debug mode display a debug banner in the top-right corner. It alerts developers that they are working with a debug version of the software, not a release version for end-users. During development and testing, the debug banner helps identify errors and validate app functionality. Setting MaterialApp widget debugShowCheckedModeBanner to false disables it.
Remove debug banner in Flutter:
- Open the
main.dartfile in your Flutter project. - Import the
flutter/material.dartpackage. - Add the
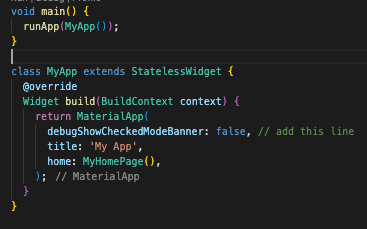
debugShowCheckedModeBannerproperty to theMaterialAppwidget and set it tofalse.
example:
import'package:flutter/material.dart';

void main() {
  runApp(MyApp());
}

MyApp extends StatelessWidget {
  @override
  Widget build(BuildContext context) {
    return MaterialApp(
      debugShowCheckedModeBanner: false, // add this line
      title:'My App',
      home: MyHomePage(),
    );
  }
}

MyHomePage extends StatelessWidget {
  @override
  Widget build(BuildContext context) {
    return Scaffold(
      appBar: AppBar(
        title: Row(children: [
          Image.asset(
            'assets/logo.png',
            height: 30,
          ),
          Text('flutterflux.com')
        ]),
      ),
      body: Center(
        child: Text('Hello, World!'),
      ),
    );
  }
}
Output

After making these modifications and clicking “Save and Run,” the debug banner should no longer be displayed.
An app’s debug banner can be hidden in a release build by compiling using the —release flag in Flutter. It will produce a release build and Remove debug banner.
Here are the steps to build a release and Remove debug banner in Flutter:
- Open a terminal window in your Flutter project directory.
- Run the following command to build the app in release mode:
flutter build apk --release
This command will generate an APK file for your app in the
build/app/outputs/apk/releasedirectory. - Install the APK file on your device using the following command:
adb install -r build/app/outputs/apk/release/app-release.apk
This command will install the app on your device without the debug banner.
In addition to enabling code reduction and obfuscation, which can both reduce your app’s size and make it tougher to reverse engineer, the —release flag will also allow other optimizations in your app. However, this could make it more challenging to track down and fix bugs in your software, so make sure everything works well before exposing it to the public.
If you want to remove the debug banner temporarily for a specific screen or widget in your Flutter app, you can use the Banner widget from the flutter/widgets.dart package.
Remove debug banner in Flutter for a specific screen or widget:
- Import the
flutter/widgets.dartpackage. - Wrap the screen or widget where you want to remove the debug banner with a
Bannerwidget. - Set the
messageproperty of theBannerwidget to an empty string.
Here’s an example:
import'package:flutter/material.dart';
import'package:flutter/widgets.dart';

void main() {
  runApp(MyApp());
}

MyApp extends StatelessWidget {
  @override
  Widget build(BuildContext context) {
    return MaterialApp(
      title:'My App',
      home: MyHomePage(),
    );
  }
}

MyHomePage extends StatelessWidget {
  @override
  Widget build(BuildContext context) {
    return Scaffold(
     appBar: AppBar(
        title: Row(children: [
          Image.asset(
            'assets/logo.png',
            height: 30,
          ),
          Text('flutterflux.com')
        ]),
      ),
      body: Banner(
        message:'', // set message to empty string
        child: Center(
          child: Text('Hello, World!'),
        ),
      ),
    );
  }
}
Save the changes and run the app to see that the debug banner is no longer visible for the Center widget. Note that the debug banner will still be visible for other widgets in your app. read too Custom Appbar in Flutter


